Table of Contents
Introduction
The further you dive into Linux the more you’ll realize it’s everywhere! From single board computers like the Raspberry Pi to servers where websites and services are stored, it can be handy to have a way to control these machines even though you are not right next to them. This type of connection is known as remote access, or logging into a different computer from the one you are using. The type of access you receive varies on the tool you use. In this article we’ll talk about several use-cases including gaining access to a remote terminal, gaining access to a remote desktop GUI, and transferring files between remote machines.
Remote Sessions
Whenever you hear the word session, it usually indicates that the span of time in which you have access to a service demarcated by an initializing and a terminating event. In a remote session, the time between initialization (i.e. logging in) and termination (i.e. logging out) is when you are connected to and controlling another computer through your own. As mentioned above, the breadth of the control depends on the type of service provided by the tool you are using.
Terminal Access
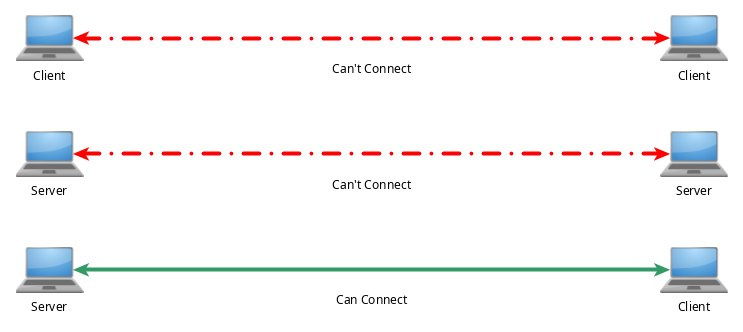
The terminal is meant for much more than executing arbitrary commands without a mouse or GUI environment. The terminal has access to many powerful tools which provide ways to interact with remote computers. In this section we will discuss three of the most popular services in this space and their evolution. All of these programs follow a server/client model, meaning the program’s server and client needs to be installed and enabled on both systems before any communication can happen. The server-side of a program is what lets other computers connect to it and respond with the appropriate information. The client-side of the program is the part that initializes the connection and asks the server for information. In order for a connection to be possible, a client must talk to a server. If you hope for both computers to be able to remotely login to one another, both will need the client and server part of whatever application you wish to use installed. Normally when you install a program like the ones below, both the client and server portion are included.
Telnet
telnet (short for teletype network) is the oldest and least secure tool on this list. telnet was developed in 1969 and was used as a protocol for “bidirectional interactive text-oriented data”. In other words, this was the first standardized tool to allow two computers to talk and send data to each other over the terminals/text-based consoles. This tool is still very versatile and has been used for applications like logging into the terminal of another computer, or even controlling a computer’s BIOS remotely!
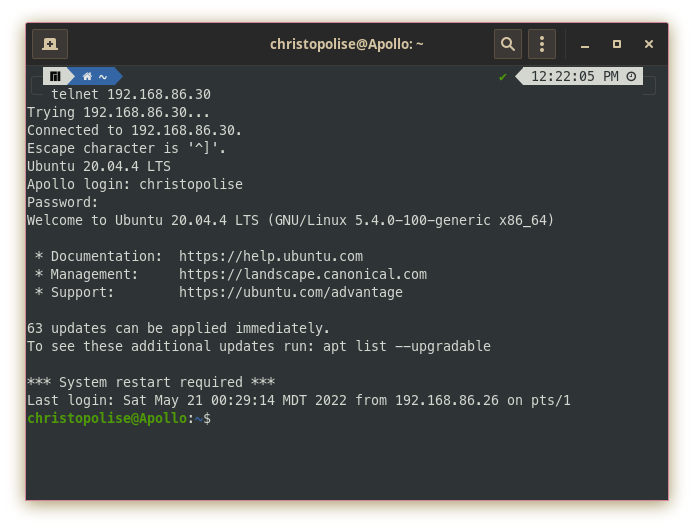
Using telnet is simple. All you need to do is type in the command followed by the IP address of the machine you are trying to access:
telnet 192.168.86.30
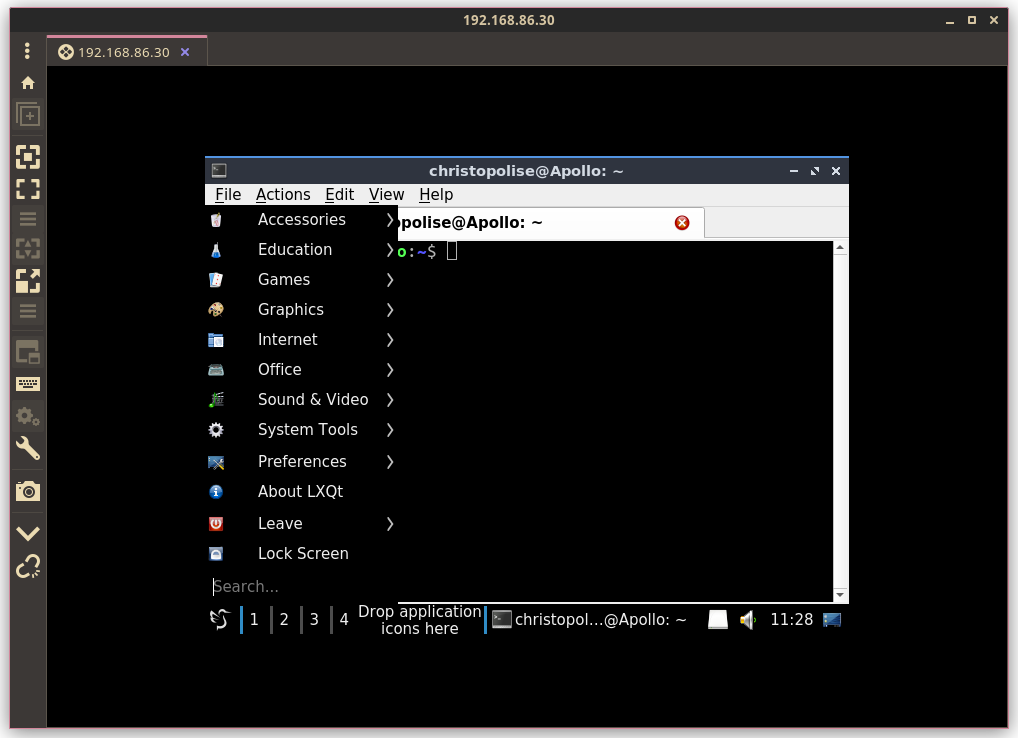
If there is a supported telnet server on the remote computer, you will be presented with a login screen and then an interface the server decides to give you based on its function. Most of the time the interface will be something simple like a virtual terminal with which you can control the other computer:
To leave, simply type exit like you would to logout or close a normal terminal session. telnet will close and return you back to your computer’s shell. For more info on how to take advantage of telnet’s full capabilities, take a look at its man page.
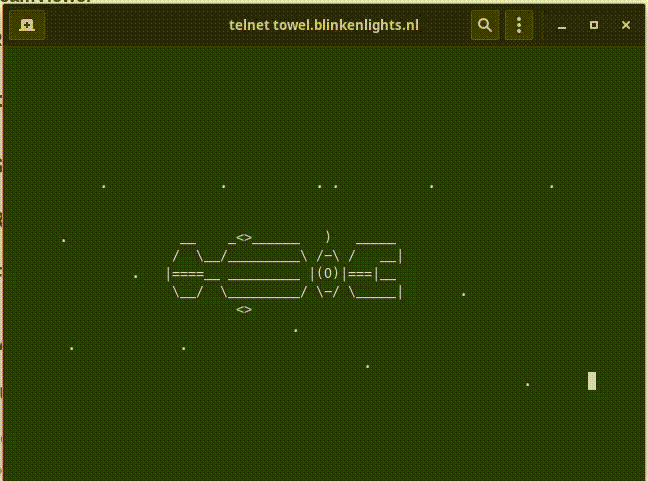
Apart from providing a remote console connection, telnet servers can be configured to display something else (i.e. access to the BIOS menu). One of my personal favorites is an ASCII representation of Star Wars Episode IV. What? How is this possible? When users connect to the telnet server at towel.blinkenlights.nl, a bash script is run upon connection which shows a nearly 20 minute, text-art synopsis of the first Star Wars movie. If you want to try it for yourself, simply go to your terminal and enter
telnet towel.blinkenlights.nl
and you will be greeted with:
telnet is a beloved and still widely used tool, but normally within trusted LANs as opposed to over the internet. The protocol doesn’t encrypt anything sending all information as plaintext instead of encrypted text over the network. If someone is listening to those packets, they will be able to see all the information inside, including the password you used to log in and the sensitive data you might be dealing with. While that is not a massive deal for when you are talking to computers within your own trusted and private network, it becomes a bigger issue when you try to connect over the internet to a computer on a different network. To have a safer, encrypted connection you need to use the SSH protocol.
SSH
The Secure Shell protocol was created as the answer to the problem that telnet left in its wake: sending information in plaintext over the network. With the SSH protocol, all data shared over a remote connection is encrypted. If anyone were able to intercept or sniff the packets from an SSH connection, they would receive encoded data which would take much longer to try and decode than the plaintext that telnet sends.
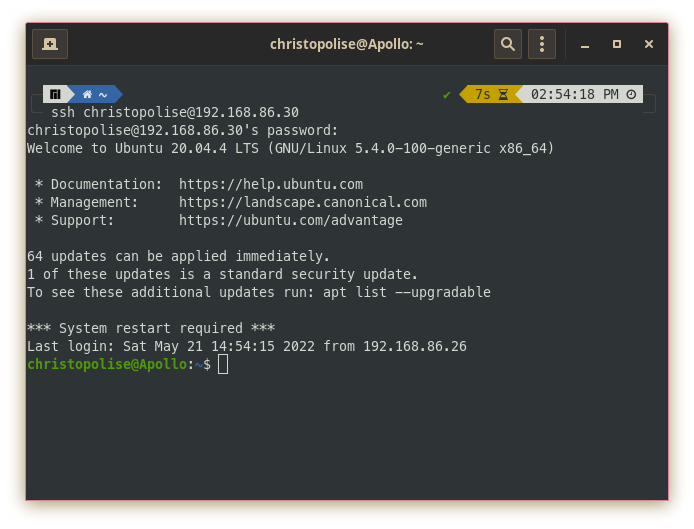
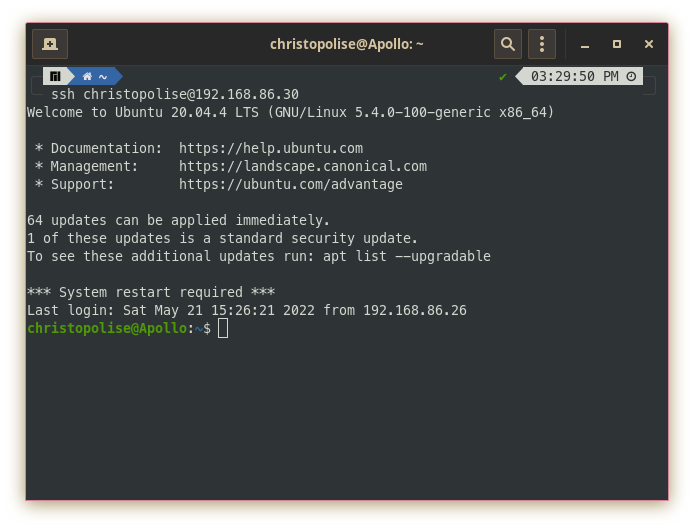
SSH serves many functionalities as a protocol. There are many interesting tools built on top of this encrypted remote connection protocol, including some of the file transfer tools we’ll discuss below. It also serves as a tool which provides remote connection to another computer. Unlike telnet, ssh’s syntax requires you to login in the format of the command, followed by the username and then the host:
ssh christopolise@192.168.86.30
You will then be prompted for your password and then be admitted into the remote computer’s console.
With ssh’s mind towards security, there are many other nifty features included to make using a tool burdened with the worry of security a little more seamless.
SSH Keys
Many people who work in a professional environment require access to a myriad of different computers on the daily. The need to provide login credentials for so many different machines at varying times throughout the day can quickly become a tedious task. Using SSH keys is a nifty way to have an SSH server remember a trusted client machine and not require it to enter in credentials every time.
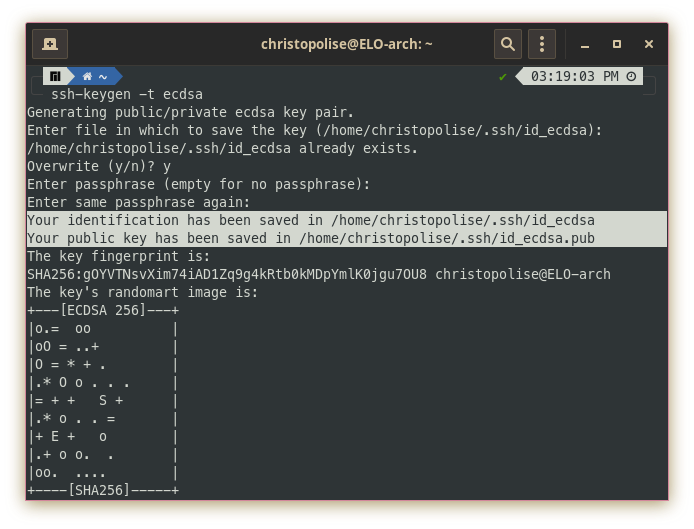
To enable this option, on our client machine, we need to generate a new key while specifying a secure hashing algorithm. (I like ECDSA):
ssh-keygen -t ecdsa
This prompts you to add a password to protect it and place it in your ssh config folder. Following this, you should receive some sort of output telling you that a few files were made from generating this key (normally having the name of the hashing algorithm in it).
After generating these files, you will need to get the output of the .pub file that was made and share it with the server. I normally do this by the following:
NOTE: It is very important you get the output of the .pub file instead of instead of the private key (the file not ending in .pub). Sharing private keys with remote connections (even with a computer that you trust) is a very bad idea which can potentially allow an attacker to decrypt all the SSH traffic you share with a server.
cat .ssh/id_ecdsa.pub
Copy the output of this file and hold onto it for a second. Sign into the desired server with your password (hopefully for the last time). Look for the .ssh folder inside the remote user’s home directory. If this does not yet exist, you can create it with:
mkdir .ssh
Then look for the authorized_keys file. If this does not exist, you can create it by the doing the following:
touch .ssh/authorized_keys
At this point you are ready to add your public key to the authorized_keys file. You can use a text editor or append the key by doing the following:
echo "<paste the contents of your .pub file here>" >> authorized_keys
And that’s it! You should now be able to log into your remote connection without entering a password every time.
If you want this to work for different users on a server, you will need to generate a separate key and place it in the home directory for each user.
Helpful Resources
SSH has become a resilient protocol and is capable of so much more than what I can show here. If you are looking for a way to beef-up the way you interact with remote servers over SSH, take a look at some of the following tutorials:
SSH Port Forwarding - GeeksforGeeks
Add remote server location to Ubuntu Nautilus using SSH
How to enable X11 forwarding using SSH
Mosh
At this point ssh probably sounds like it couldn’t get much better, right? Well yes and no. While ssh does many things to ensure the security of a remote connection, it does not do much by way of ensuring the reliability of this connection. This is a thing that the Mobile Shell aims to fix by using UDP instead of TCP as ssh does. What’s the difference? TCP requires a persistent connection to be made between the two computers. Much goes into setting up this connection, but once it is set up, the data can be reliably sent between a sender and a receiver. If any packet of information gets lost, TCP will ensure that the packet is resent by the sender so that the information sent is complete and in order. Some drawbacks of this is that if the physical connection between two computers is spotty or unreliable enough, TCP will opt to terminate the connection rather than chance sending incomplete or out of order data. This can prove to be an annoyance if the environment you are in doesn’t have a stable internet connection or you are walking around using cellular data. When using ssh, if your TCP connection is lost or terminated, the ssh program will hang frozen and you will have to close the window and reconnect to the server to continue your remote work.
mosh hopes to fix this problem entirely by using UDP instead of TCP. Unlike TCP, UDP doesn’t assume the responsibility of maintaining a connection or ensuring the completion or reliability of data coming and going. Instead, a UDP sender fires information at a specified UDP receiver and hopes for the best without any acknowledgement. This is starting to sound plain awful, no? Not quite. Just because UDP doesn’t ensure this quality doesn’t mean that mosh doesn’t. mosh uses a variety of techniques to send information over various UDP senders to ensure reliability, but also resilience against spotty connections that would close a TCP connection. With this configuration, mosh hopes to be the tool of choice when you are roaming (i.e. walking around a building, switching between routers as you walk past them) or cellular connections.
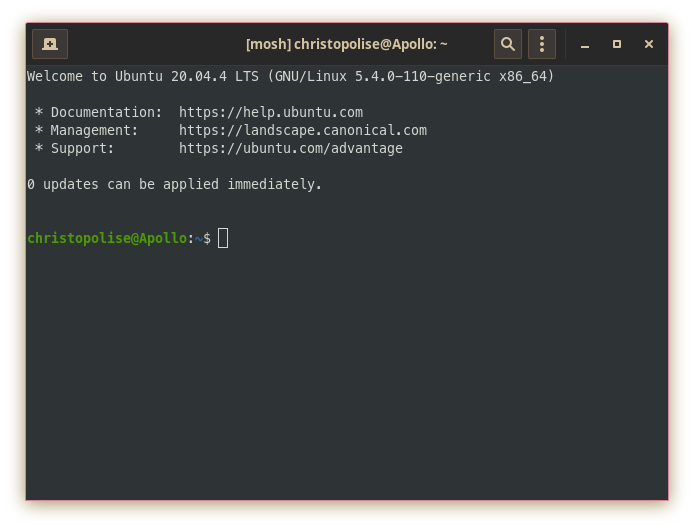
If you are familiar with how ssh works, mosh will be second nature to you. To login, you still use the same syntax of:
mosh christopolise@192.168.86.30
Furthermore, mosh recognizes and uses the SSH keys made if you have already set them up while using ssh from before!
Desktop Access
More often than not, remote terminal access will suffice for the majority of your needs when working on a project. On occasion, it is absolutely imperative to see the desktop and have point and click access. Examples of this include remotely using a GUI tool that has no terminal equivalent or helping someone who lacks the right vocabulary troubleshoot a technical problem. Below are several popular tools that accomplish this exact function.
TeamViewer
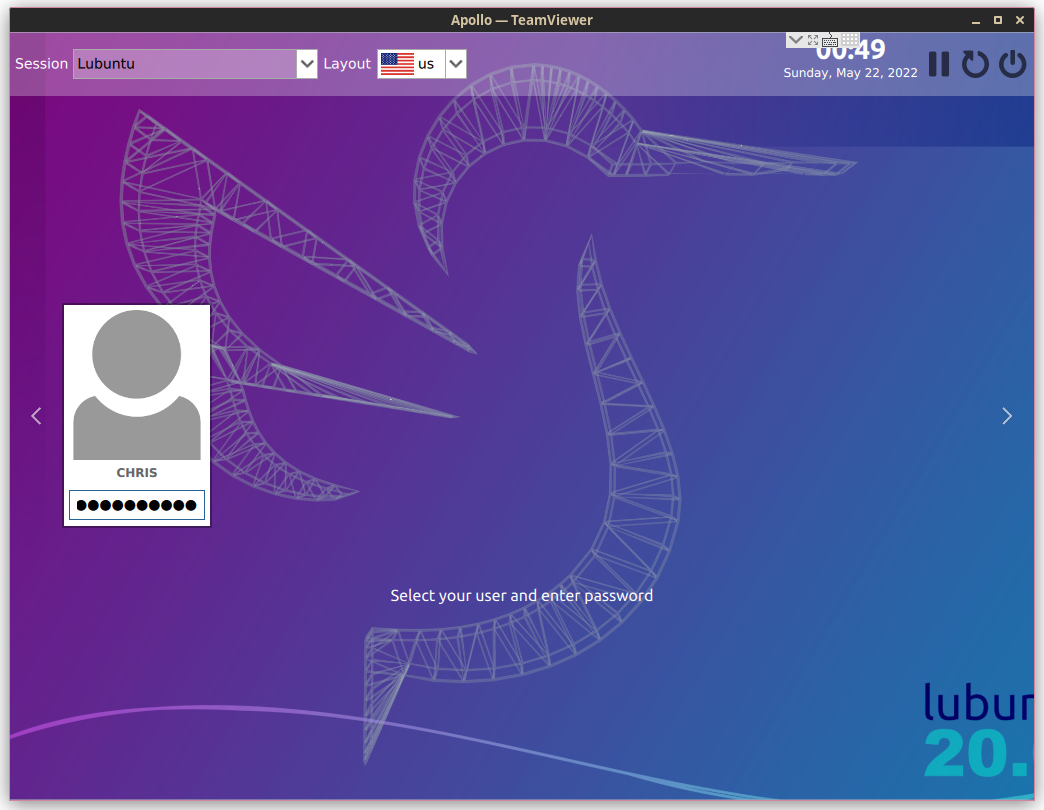
TeamViewer is a nifty, free-to-use tool which allows you to see and control a remote user’s desktop. Like most proprietary software, TeamViewer is maintained by a company to ensure that it is stable and has good maintenance. This has made the software a leader in remote desktop access, especially in the IT support market. With TeamViewer installed on both machines, you will need to get the remote computer’s ID and password. Using that information, you will be brought to a window where you can control the user interface of the remote machine as though it were your own:
Remmina
Much like TeamViewer, Remmina is a GUI tool which allows you to see a remote desktop. The main difference between this tool and the latter is the amount of supported protocols for communicating with the remote desktop. The ones available on my installation are RDP, X2GO, and SSH (which seemed to make the program act more like PuTTY than a virtual desktop).
Since there are a variety of supported protocols for Remmina, it will be necessary to ensure that your remote machine has at least one of these installed on it. For example, if you wanted to connect to a remote machine with Ubuntu using RDP, you would need to do the following on that machine:
sudo apt install xrdp -y && sudo adduser xrdp ssl-cert && sudo systemctl restart xrdp
This installs the RDP service on the machine, adds the user which controls RDP to the group which controls secure application layer connections through SSL, and then restarts the service that is running RDP.
After this has been done on the remote machine, you can then go through the appropriate menus on Remmina (taking care to choose the previously installed protocol) to achieve a result like this:
File Transfer
Hopefully you are convinced of the utility of using a remote computer! Using a tool to start a session on a remote machine can be very helpful. However, there are limitations in maintaining a remote session. By default, there are no ways inside of a remote session to send files outside of that session. That is, unless you use some of the following file transfer tools. Instead of establishing a persistent remote session, there exists a suite of tools available inside and outside of sessions which move files from a remote to a local machine and vice versa.
scp
Secure copy is a tool that uses the SSH protocol to move files between a remote and local computer. This tool is an evolution from the BSD’s rcp or remote copy which one of the first remote file transfer protocols. scp was the evolution which was built on top of the SSH protocol which provides SSL security. Unfortunately, according to these release notes, as of 2019 scp is considered insecure, outdated, and unable to be fixed. The notes “recommend the use of more modern protocols like sftp and rsync for file transfer instead.”
rsync
The remote synchronization tool is built on top of SSH and allows a user to synchronize files across multiple computers. Instead of copying a file over to a remote computer, rsync looks as the difference between the two versions of a file on both the remote and local machine and updates the fragment of the file/files that have been changed. This makes the file transfer/synchronization very efficient and inherently more secure.
Using rsync is very similar to using ssh and cp combined. In cp you would put the command, the source file and its destination all in sequence. This is also the case in rsync but when we are syncing to or from a remote computer, we will use the ssh syntax of user@host :
rsync source.txt user@192.168.4.1:/home/user/Documents
You will note that if you want to place/update the source file in a specific directory, you will place it after the ssh user/host pair preceded by a colon. If you want to see more about how rsync works and what are the different types of options it supports, you can refer to its man page.
sftp
The Secure File Transfer Protocol uses an SSH session to allow file transfer between a remote and local computer. Unlike scp and rsync, sftp is a utility that requires you to use a specialized shell to get files from the remote machine to a local machine. The following article does a good job in summing up what is possible with this tool.
15 Examples of SFTP command in Linux
Misc. Tools
As you become more familiar with the networking stack and its distinct layers, you will also come to realize that there are many protocols for communicating with remote machines. Our browsers do this using the HTTP protocol, our terminals use things like SSH, and other distinct programs use various other protocols like RDP or TeamViewer. Below are a list of other programs you can use to communicate with either a machine or a remote website through the terminal:
Conclusion
While operating systems like Windows provide a many different downloadable tools to facilitate communication with remote machines, they pale in comparison to the wide array of application specific command-line tools that are provided in Linux. Having a solid understanding of which remote tool to use for which occasion will allow you not only to administrate between all your different machines effectively, but can also prove useful in putting commands like these into scripts to save much more time and establish a robust and efficient automated workflow.